Building

Pre-drywall inspection in Calgary: what to check before the walls close

This is the best time to catch problems in a new build. Learn what a pre-drywall inspection checks in Calgary, what photos to take, and what to ask your builder.

Pre-drywall inspection in Calgary: what to check before the walls close
January 5, 2026
Building

Why pre-drywall is the most valuable inspection stage

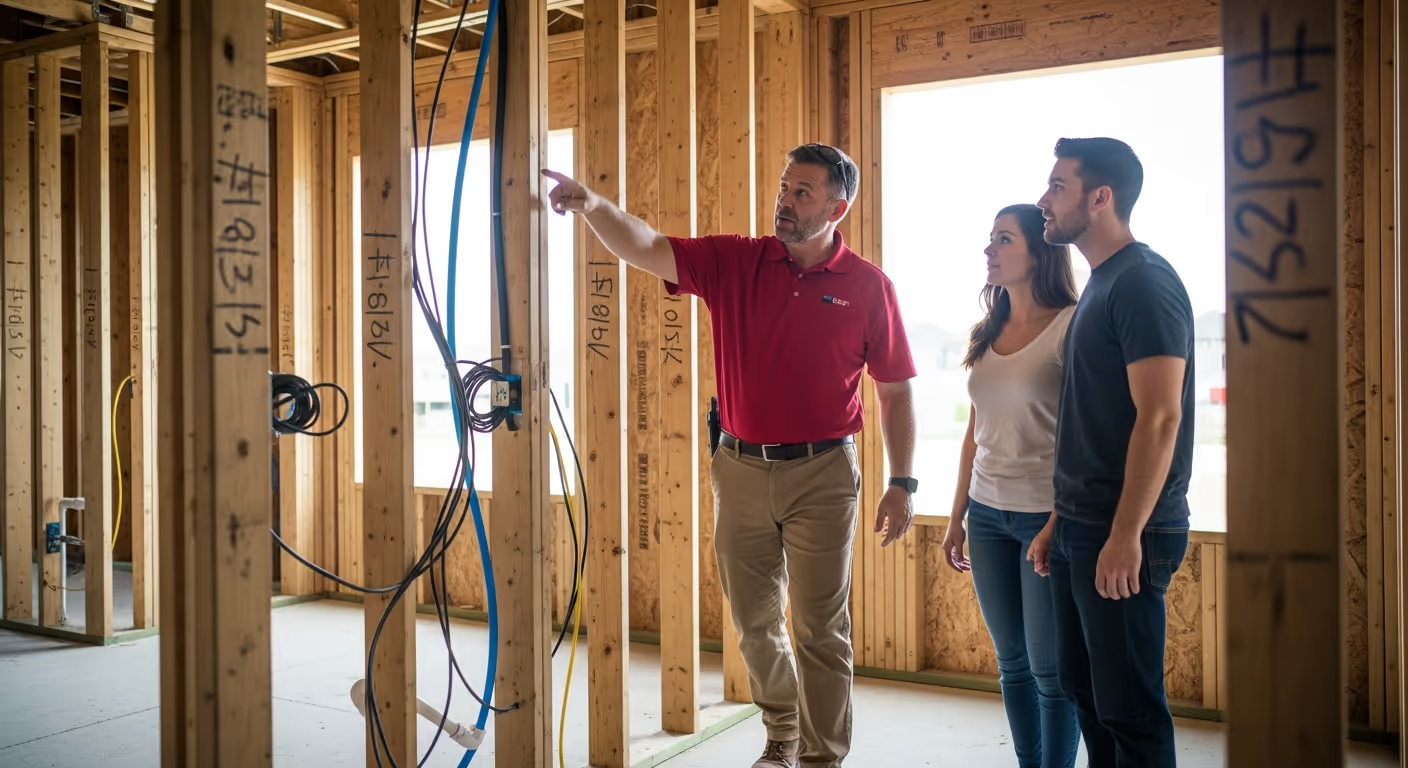
Once drywall goes up, most of the home’s work is hidden. Pre-drywall is the short window when framing, wiring, plumbing, and HVAC rough-ins are visible. Small fixes are easy now. The same fixes after drywall can mean cutting holes, patching, painting, and delays. A pre-drywall inspection is not about nitpicking. It is about catching the things that affect safety, moisture, comfort, and long-term durability.

What a pre-drywall inspection is (and what it is not)

This inspection is a visual review of the build before insulation and drywall. It checks workmanship, basic layout, and visible compliance items. It does not replace municipal inspections, engineering reviews, or trade sign-offs. Think of it as a second set of eyes on the parts you will never see again once the walls close.

When to schedule it

Book the inspection when:

  • Framing is complete
  • Rough electrical, plumbing, and HVAC are in
  • Windows and exterior doors are installed
  • Insulation and vapor control have not started

If the builder is moving fast, book early so you do not miss the window. A single day can make the difference between seeing everything and seeing almost nothing.

What inspectors check at pre-drywall

Every inspector has a slightly different flow, but most focus on the same core systems.

Framing basics

  • Overall framing quality: straight studs, secure connections, no missing fasteners or loose blocking.
  • Openings: doors and windows framed correctly with proper headers and support.
  • Bracing and load paths: beams and posts supported as designed, with proper connectors.
  • Fire blocking: required blocking where wall cavities could act like chimneys.
  • Draft-stopping: in key concealed spaces where needed.

You are not trying to be an engineer on site. You are looking for obvious misses and sloppy work that will cause squeaks, cracks, and uneven walls later.

Air sealing details that matter in Calgary

Cold weather makes air leaks obvious fast. Pre-drywall is a good time to spot big leak paths.

  • Top and bottom plates: gaps at plates create big leak lines across whole rooms.
  • Penetrations: holes for pipes and wires should be neat and ready to seal.
  • Window and door rough openings: even gaps for foam and backer rod, no missing shims.
  • Mechanical chases: open chases can move air from basement to attic fast.

Electrical rough-in

  • Box placement: outlets and switches at the right height and location, with enough in key areas.
  • Kitchen planning: island outlets, counter spacing, fridge water line spot, and dedicated circuits.
  • Cable protection: staples neat, and nail plates installed where wires pass near stud faces.
  • Panel layout: space for future circuits, clean routing, and a plan for labeling.
  • Low-voltage: data lines, doorbell wire, camera runs, and ceiling lines for Wi-Fi access points.

If you want more outlets or better lighting, this is the time to ask. After drywall, every change costs more.

Plumbing rough-in

  • Pipe routing: clean lines, proper supports, and sensible access paths for shutoffs.
  • Drain slope: lines should fall the right way with no odd back-pitches.
  • Shower and tub prep: mixing valves set to the right depth for finished wall thickness.
  • Exterior faucets: frost-free sill cocks and clean penetrations ready to seal.
  • Vent stacks: proper routing and supports, no sharp, cramped turns.

HVAC rough-in

  • Supply and return layout: enough returns so rooms do not starve for airflow.
  • Duct sealing: joints sealed where required, not just “pressed together.”
  • Bath fan ducts: routed to the exterior with short, straight paths where possible.
  • Range hood venting: planned to vent outdoors, not into attic spaces.
  • Combustion air and vent routes: for high efficiency systems, intake and exhaust paths should be sensible and clear.

In Calgary, a small duct mistake can show up as a cold bedroom for years. Pre-drywall is your best chance to fix comfort issues before they become normal life.

Windows, doors, and flashing prep

  • Window install: plumb and level, with proper shims and attachment.
  • Flashing details: visible step flashing and proper overlap where applicable.
  • Sealing plan: gaps ready for foam, backer rod, and sealant at the right stage.

Fire safety and garage separation

Attached garages need strong separation from living areas. Inspectors often look for:

  • Proper door type between garage and home
  • Sealed penetrations through garage walls and ceilings
  • Correct duct and vent routing so garage air does not travel into the home

What homeowners should do before the inspector arrives

  • Bring your plans: even a printed PDF helps you confirm outlet counts and room layouts.
  • Mark lifestyle spots: stand where the couch and bed will go, and confirm outlets are there.
  • List changes you want: extra outlet, extra light, data run, EV circuit, or added bath fan timer.
  • Ask for access: confirm the builder will allow entry and that lights are on if possible.

Photos to take for your own records

Even if everything looks good, take photos. You will thank yourself later.

  • Every wall in the home, wide shots
  • Plumbing routes at bathrooms and kitchen
  • Electrical runs and outlet box locations
  • Ceiling runs for lights and fans
  • Any special backing for TVs, railings, or shelves

These photos help when you want to hang a TV, install a shelf, or trace a pipe years later.

Common issues that show up at this stage

  • Missing nail plates: wires or pipes too close to stud faces
  • Bath fans planned to vent into attic: a major moisture issue if not fixed
  • Weak return air plan: bedrooms with supplies but no returns or transfer paths
  • Odd duct turns: crushed flex duct or sharp bends that reduce airflow
  • Outlet misses: no outlet in the pantry, near the entry shelf, or at the island
  • Shower valve depth errors: finished trim will not sit right without adjustment now
  • Open chases to attic: air and fire path that should be blocked or sealed

How to talk to your builder after the inspection

Keep the tone calm and organized. Builders respond best to clear, grouped notes.

  • Group items by trade: framing, electrical, plumbing, HVAC, envelope
  • Attach a few key photos with circles or arrows
  • Ask for a target date for each fix
  • Confirm that fixes will be complete before insulation and drywall

If you want changes that are not “fixes” (extra outlets or lights), ask fast and accept change order costs. The point is to decide before the wall closes.

What if the builder says “it’s normal”

Sometimes that is true. New builds settle and small drywall lines can appear later. At pre-drywall, your focus is on items that become expensive once hidden: vent routes, missing protection plates, comfort problems from duct layout, and moisture risks. If the issue touches safety or water control, ask for the reason in writing and request the plan for correction, even if the answer is “we will handle it at the next stage.”

How pre-drywall connects to your 30-day and 1-year lists

Think of pre-drywall as the foundation for the rest of your warranty plan. If you solve comfort and moisture risks now, your 30-day list becomes small. Your 1-year list becomes mostly cosmetic. That is the best outcome: you spend your first year enjoying the home, not chasing trades.

Simple pre-drywall checklist you can bring to site

  • Bath fans and range hood vent outdoors
  • Nail plates on any wire or pipe near the stud face
  • Return air plan for bedrooms and basement
  • Outlet count at island, pantry, entry shelf, and office desk
  • Data lines to TV wall and ceiling for Wi-Fi access points
  • Shower valve depths set for finished wall thickness
  • Clear attic hatch area planned and sealed later
  • Garage separation details and sealed penetrations

The payoff

A pre-drywall inspection is a short visit that can prevent long-term stress. You catch comfort issues before they become “just how the house is.” You stop moisture paths before they create attic frost. You make simple electrical and data choices before drywall turns them into expensive upgrades. In Calgary, that means a home that feels warm, dry, and easy from the first winter onward.

Blog

Home inspection tips and advice

Explore tips, updates, and practical advice on buying, maintaining, and protecting your home. Our posts help you stay informed and confident in every decision.

December 4, 2025
Building

Smart electrical planning for your new-build in Calgary

Plan outlets, lighting, and low-voltage while walls are open. This guide shows what to place, where to place it, and how to future-proof a Calgary new-build.

read article
November 20, 2025
Building

30 day and 1 year new build warranty checklist for Calgary homes

Your builder warranty is tied to deadlines. Use these 30-day and 1-year lists to find issues, document them well, and get fixes approved in Calgary.

read article
November 8, 2025
Building

Final walkthrough checklist for new-build possession day

Your last chance to catch issues before move-in. Use this simple walkthrough plan to check systems, finishes, and safety items on possession day in Calgary.

read article
Ready to book?

Schedule your home inspection today

Whether you’re buying, maintaining, or moving into a new build, we’re here to help with clear, reliable inspections.

get a free quote