Once drywall goes up, problems get harder to catch. See what inspectors check at the framing stage and why this visit saves money and headaches for Calgary buyers.
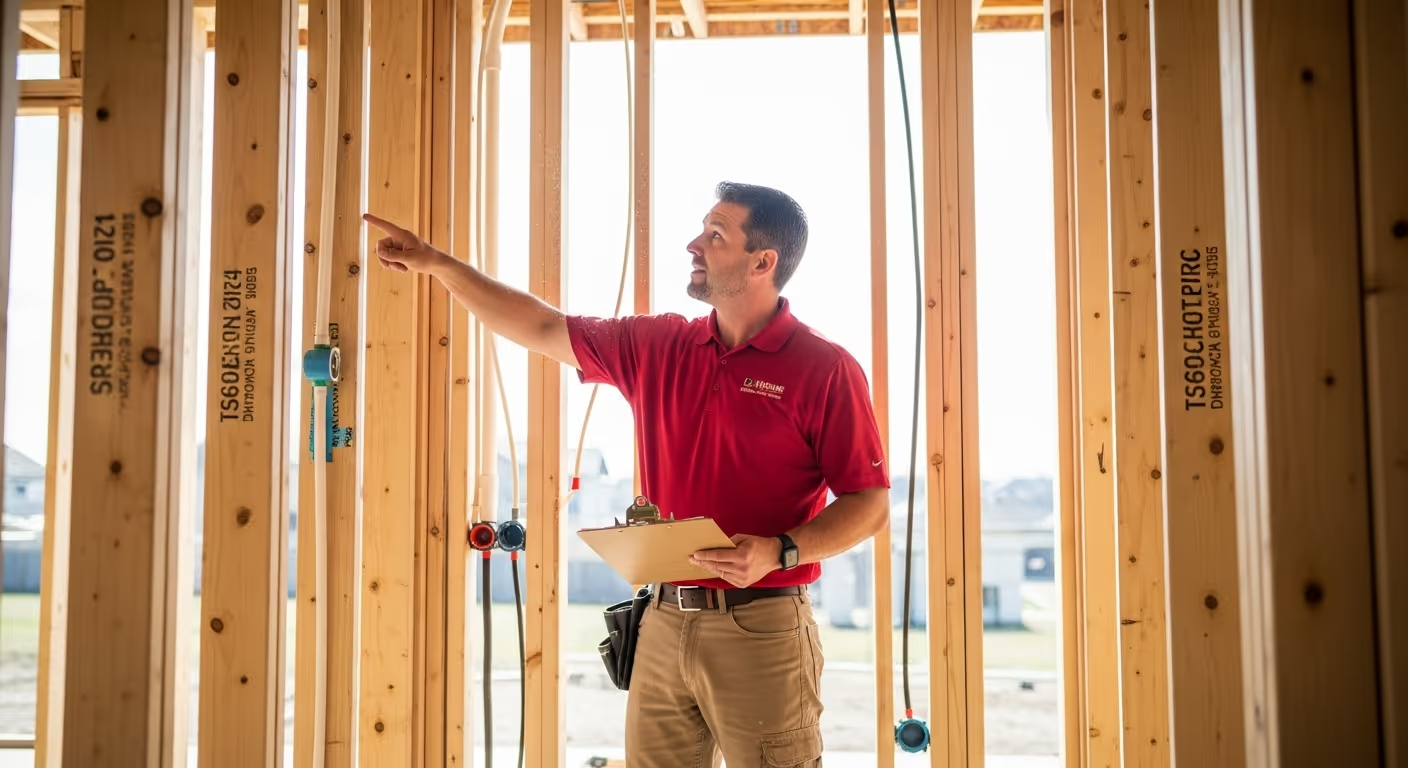
A pre-drywall inspection happens when the frame, roof, windows, doors, electrical rough-in, plumbing lines, and HVAC ducts are in place, but the walls are still open. This is the best window to check how the home is built beneath the finishes. Once the board is up, many details are hidden. Fixes get slower and more expensive. At this stage, an inspector can walk every room, look inside the walls, trace wires and pipes, and spot problems that a final walk-through cannot reveal.
Our climate swings from deep cold to warm chinooks. That shift puts stress on framing, air barriers, insulation, and roof details. Hail and heavy snow test flashing and ventilation. Heat loss shows up fast if the air barrier is sloppy. A pre-drywall inspection checks these stress points while it is still easy to correct them. The goal is simple: a house that not only looks new, but also holds heat, sheds water, and stays solid when the weather turns.
Framing is the skeleton. When it is right, doors swing true, cabinets sit flat, and drywall stays crack-free. When it is off, the home fights you for years. Inspectors look for:
Small framing fixes are simple with open walls. After drywall, even a minor correction means mess and extra cost.
Good electrical work is neat and clearly labeled. Inspectors review:
This is also the time to confirm outlet and switch placement makes sense for how the room will live.
Water problems often start small, then show up months after move-in. Inspectors focus on:
A tiny leak at a loose joint is easy to tighten today. After tile and paint, it is a repair.
Comfort is not just about a new furnace. Airflow and layout matter. Inspectors check:
Rooms that never feel right often trace back to this stage. Fix it now while ducts are open and reachable.
In Calgary, heat loss and attic frost are common when air sealing is weak. A pre-drywall visit checks:
Even before batts or blown-in insulation go in, the air barrier plan should be clear and continuous.
From the ground and from the attic, inspectors look for clues:
Hail and heavy snow push these parts hard. Clean details now save you from leaks later.
Open walls let you see the story behind the trim. Inspectors confirm:
Poor prep here leads to drafts, noise, and water stains that show up one season later.
Some of the most important safety items are invisible after drywall:
Your report should include photos, room-by-room notes, and simple language. Expect a short list of high-priority fixes and a longer list of tidy-ups. Items are grouped by system (framing, electrical, plumbing, HVAC, air/water). Each note should say what was seen, why it matters, and the next step. Share the list with your builder in an organized way. That keeps the tone calm and the schedule moving.
You do not need tools, just a little time and a plan:
This is the moment to confirm outlet locations, switch heights, and blocking for heavy items on walls.
Builders respond well to clear, grouped notes and photos. Keep emails short. Use bullet points by system and include location tags (e.g., “Bedroom 2, north wall, outlet missing box support”). Ask for dates, not “soon.” If weather limits roof checks, request a spring follow-up. The goal is a clean handoff, not a long debate.
It is still a visual check. Inspectors do not do destructive testing, code enforcement, or full design rework. Some items, like final insulation thickness or blower door results, come later. The value here is access: you see structure, routes, and seals before they vanish.
Think about cost and hassle. Moving a duct now takes minutes. Moving it after paint means cutting drywall, calling trades back, patching, sanding, and repainting. The same goes for nail plates, draft stops, missing blocking, or a miswired GFCI. A short punch list at the framing stage prevents a long list after move-in.
Keep the pre-drywall report with your final inspection and your 30-day and 1-year lists. If something resurfaces later, you have a record that shows when and where the concern started. That paper trail helps when you talk to the builder under warranty.
Homes that pass a careful pre-drywall review feel different. Doors close softly. Rooms heat evenly. Fans vent outside. Windows lock and seal. You still get that “new home” feeling, just without the common annoyances that show up after the first winter. That is the value of this stage: you lock in quality while it is still easy to build it in.

Written by the Calgary Property Inspections team, local home inspection professionals helping buyers, homeowners, and new-build owners make safer, clearer decisions about their homes.

Explore tips, updates, and practical advice on buying, maintaining, and protecting your home. Our posts help you stay informed and confident in every decision.

Plumbing issues are easier to fix before drywall. Learn what Calgary new-build buyers should check during plumbing rough-in, from drains and vents to shutoffs, bathrooms, laundry, and future leak risks.
read article
Heating, airflow, and ventilation problems often start before drywall. Learn what Calgary buyers should check during HVAC rough-in so new homes feel warmer, drier, and more comfortable.
read article
Bathroom fans do more than clear steam. Learn what Calgary new-build buyers should check before possession, during the first month, and before the 1 year warranty mark.
read article